One approach to completing the tutorial in the JumpStart Rails book by Andy Hawthorne has you creating a sandboxed development environment. If you use Windows, the following will be a particularly useful solution for you, especially if you want to try out another option for installing Rails, other than the Rails Installer as described in the book.
I’ve used Linux for quite a while now, but recently installed the CrunchBang distribution (#! to its friends). This is based on the ultra-stable Debian distribution and describes itself as a ‘nimble’ operating system. It certainly is – I’ve found it to be fast, stable and there’s also a vibrant and friendly community.
I’m going to go through the installation from start to finish so that we have Ruby, Rails and Postgresql all installed and ready to roll. Personally, I’d recommend that you install CrunchBang as your new primary operating system, but if you don’t want to go that far then we’ll look at using VirtualBox to install it on a virtual machine.
Installing VirtualBox
If you want to run #! on a virtual machine, you’ll need VirtualBox or some other virtualization software. You can get it from here. The installation instructions are included for all major operating systems.
You’ll also need the ISO image for #! which you can get as a torrent from the CrunchBang website.
Once you’ve got those two items, it’s time to install #!.
Installing #!
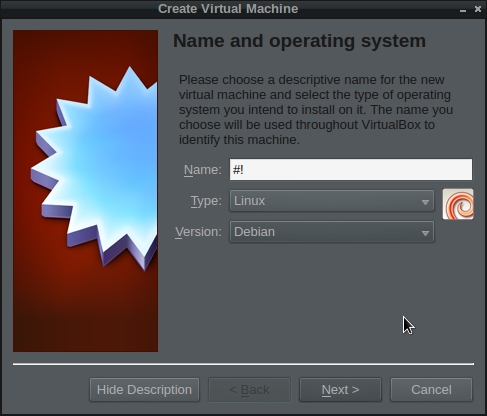
Start VirtualBox and then select ‘New’ from the top menu. From here, select a name for your new virtual machine (I called mine ‘#!’), choose ‘Linux’ as the type and ‘Debian’ for the version, as shown in the screenshot below:
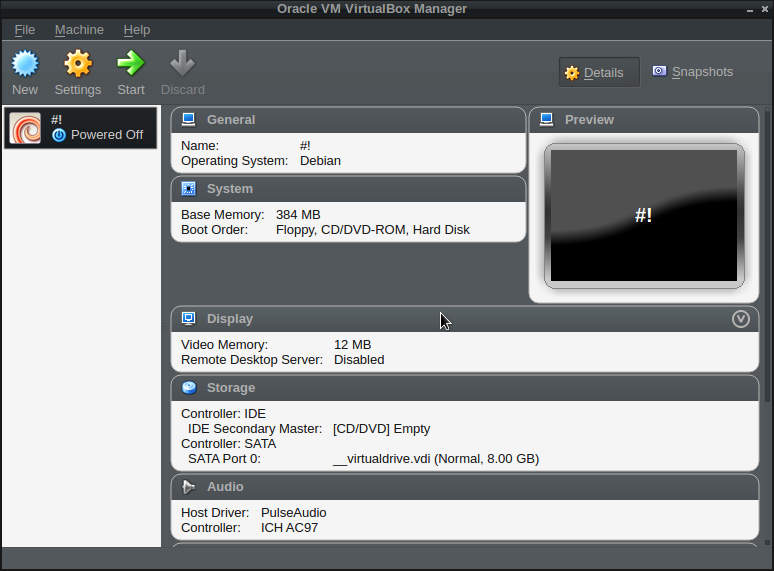
Now keep clicking ‘next’, selecting the default options until you get to the screen where you need to choose a name for your new virtual hard drive. Choose a name (I went for ‘__virtualdrive’) and then click next to finish setup. You should see a screen similar to the screenshot below:
Now double-click on the virtual computer we just created and you’ll be taken to another menu where you have to choose the start up disk. This is the ISO image that we downloaded from the CrunchBang website. Navigate to where this is saved and select it. This should now take you to the CrunchBang Linux installation screen as shown below:
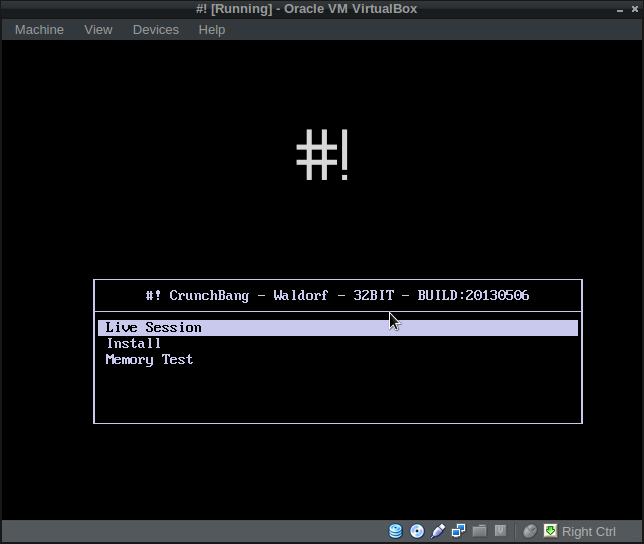
Use the arrow keys to move down to ‘Install’ and press ‘Enter’ to start the installation process.
The first few screens ask you to select your language, loacation and keyboard layout. Select the appropriate options using the arrow keys and then press ‘Enter’. Next, after a few files have been loaded, you’ll be asked to enter the hostname, I just went with the default ‘crunchbang’. Then you need to enter you personal details as well as a password. Once this is done, you’ll be asked about partitioning the disk – choose the first option ‘Guided – use entire disk’. Click on ‘continue’ and then select the virtual HD we set up earlier. On the next screen, since this is just on a virtual drive, it’s easiest to choose the first option ‘All files in one partition’. If you are installing this on your actual machine then I’d suggest choosing the either the second or third options to keep home directory separate. Once you’ve selected this, you’ll be shown a summary of options. Click on continue, then select ‘yes’ to confirm and the installation process will begin. This takes 20-30 minutes so you’ve got enough time to go and get a coffee at this point.
Towards the end of the installation you’ll be asked if you want to use the GRUB installer. Choose yes and click ‘continue’ and then wait for the installation to finish. The virtual machine will then reboot and #! should load up.
You might get a fatal error that says the machine will abort. If this happens, select ‘Ignore’ to see the error message. If this is ‘The guest is trying to switch to the PAE mode which is currently disabled by default in Virtualbox’, then all you need to do is click ‘ok’ then go to settings in VirtualBox, select ‘system’ from the menu on the left, then click on the ‘Processor’ tab and check the box marked ‘Extended Features PAE/NX’. After this reboot the virutal machine and it should load up without any problems.
When it boots up, you should see the rather classy #! login screen like the one shown in the screenshot below:
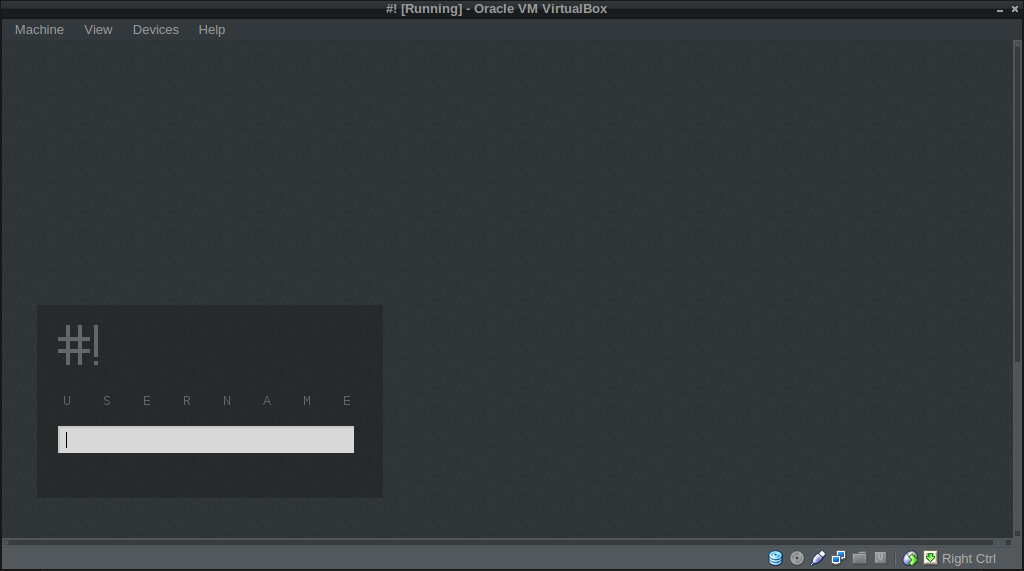
Enter your login details and you should be greeted with the following screen:

When you first login there is an installation script that runs, asking you if you want to install things such as Java and printer support. We don’t need any of these for what we’re doing here, but feel free to install anything that you think will be useful. If you want to skip this step and come back to it later then just close the window. You can always run it at a later time by entering the command cb-welcome in a terminal window.
Finding Your Way Around #!
Now that you’ve successfully installed #!, you might want to spend some time having a look around and getting to know how it works. It uses the Openbox window manager which can take a bit of getting used to, but is also highly customizable. Everything can be controlled from the main menu which is accessed by right-clicking anywhere on the desktop. There are also a number of shortcut keys for performing tasks. These are shown on the right of the desktop (for example super+w opens Iceweasel, the default browser, which is basically an unbranded version of Firefox).
That thing on the right is Conky which basically shows information about your system. You can put quite a lot of information there – see this thread for more information.
!# uses multiple desktops and uses 2 as default that can be seen as tabs at the top of the screen. These are useful for organizing your different windows that are open (work and play for example).
The default text editor is Geany which is very powerful. You can open it using super+e or right-click on the desktop and go down to ‘Accessories’ and select ‘Geany Text Editor’.

If you want to install any software, you can use the Synaptic Pakcage Manager. Just right-click anywhere on the desktop and go down to ‘System’ and then select ‘Synaptic Package Manager’ from the menu.
If you use Dropbox then this is very easy to install. All you need to do is open a terminal window and enter the following line:
$ wget -O dropbox.tar.gz "http://www.dropbox.com/download/?plat=lnx.x86"This will download the file you need. Next you have to extract it using the following command:
$ tar -xvzf dropbox.tar.gzNow everythng should be set up. To check it, run the following command:
$ ~/.dropbox-dist/dropboxdIf the installation was successful then Dropbox should start to run and you should be asked to log in. You’ll also see the Dropbox icon in the top right (you can click on this to open your Dropbox folder). We actually want this to start every time we log in. This is controlled by a file called ‘autostart’. We can add commands to this for any programs that we want to launch when we log in. To edit this file we just need to right click, go down to ‘Settings’, then select ‘Openbox’ and choose ‘Edit autostart’, now add the following lines of code to the bottom of the file:
## Run dropbox
~/.dropbox-dist/dropboxd &
Now Dropbox should automatically start every time we log in!
Installing Ruby and Rails
We’re going to use Ruby Version Manager to install both the latest versions of Ruby and Rails. This can be done in the terminal in a single line. Open up a terminal (super+T) and enter the following line of code:
$ curl -L https://get.rvm.io | bash -s stable --autolibs=3 --railsThis will then start the installation process for Ruby and Rails. It can take quit a long time, so this might be a good chance to grab another cup of tea.
When the installation process has finished, we just need to check that everything has gone to plan by checking which version we have:
$ ruby -v
ruby 2.0.0p195 (2013-02-24 revision 39474) [i686-linux]
$ rails -v
Rails 3.2.13
If everything has gone to plan, you should see similar versions to those listed above. All we need now is a database server!
Installing Postgresql
In JumpStart Rails, the Postgresql database is used locally for persistance, so this we’ll install this next, as well as the PGadmin program. To do this, we need to use the apt-get command which installs software from the Debian repositories (Synaptic is a simply a GUI front-end for apt-get). Open up a terminal and enter the following:
$ sudo apt-get install postgresql-9.4 pgadmin3sudo is used for any commands that require administrator privileges, so you’ll be asked to enter your password to complete the installation.
To check that this has worked you can try accessing the default database with the following command:
$ sudo -u postgres psql template1This uses the default user ‘postgres’ to access the ‘template1’ database. If everything is working correctly you should see the following:
template1=#Just one last thing to install now!
Installing Image Magick
The project in the book will also require Image Magick to manipulate images, so we’ll also install it using apt-get with the following line of code:
$ sudo apt-get install imagemagick libmagickwand-devReady to Roll on Rails
And now you’re all set and ready to jump start into the world of Rails. I hope that you enjoy using #! Linux and might consider using it for more projects in the future. I’d love to hear what you think of it in the comments below.
 Darren Jones
Darren loves building web apps and coding in JavaScript, Haskell and Ruby. He is the author of Learn to Code using JavaScript, JavaScript: Novice to Ninja and Jump Start Sinatra.He is also the creator of Nanny State, a tiny alternative to React. He can be found on Twitter @daz4126.